To create your own Firefox Sync server you need this file -> click. If file is not accessible try this or contact me.
( There is a contact form somewhere here )
So when you got all the needed files click away to your NAS station.
First make sure that you have installed myphpAdmin and mySQL is enabled. ( You can get those in Package Center under available tab )
After that log in to your myphpadmin console and create new DB with name FFsync ( or something else )
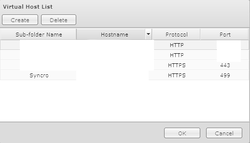
In Control panel / Web services create new virtual host, specify name and port.
Syncro | sync.domain.sth:|499 (Using 499 because 443 is already used)
!!Attention!!
If using self-signed certificates on NAS station and HTTPS protocol you must add permanent accept for that certificate on synchronization client . If using plain HTTP ( Not recommended )you do not have to configure any certificate settings.
When virtual host is created new folder in File station will appear with exact name as virtual host created in Web services.
Into that folder unzip the file that you downloaded from previous link. Index file must be in root folder of Virtual Host folder ( Also others ). When the unpacking and copying is done go to your Firefox web browser and type in the address :
https://domain.sth:499 ( If you selected different port number) and something like this should appear:
https://domain.sth:499 ( If you selected different port number) and something like this should appear:

Select your option ( I tested MySQL ) and hit OK.
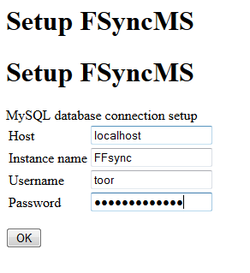
When asked for connection setup just type in the localhost instance name of DB created and username and password.
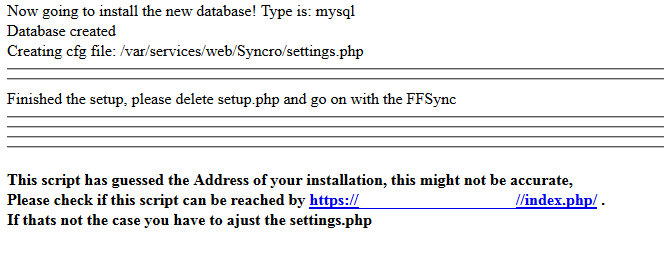
If the installation was successful message like one on left is presented.
You still need to rename or delete setup.php in Virtual Host folder and if you changed your port number you must change port number in settings.php file.
You still need to rename or delete setup.php in Virtual Host folder and if you changed your port number you must change port number in settings.php file.
When this is done connect to your newly created sync link:
https://domain.sth:449//index.php/ <-- watch out for the last slash (/), if not there, sync will not work!
https://domain.sth:449//index.php/ <-- watch out for the last slash (/), if not there, sync will not work!

If everything configured correctly you get a warning that this was not sync request which is logical because we did simple HTTP request.
Next step is Firefox options and create new sync account. Choose different sync server and point it to your URL.
Happy syncing.
PS.. This also works on any Apache or XAMPP server with mySQL support ;)
Curiosity killed the cat, but for a while i was a suspect, and i proved them wrong. Cat is still alive though...

 RSS Feed